Posts Tagged dvd authoring

Create a DVD Tutorial. Part 7

This post begins from from here: Create a DVD tutorial in case you are lost.

In this post series I talk about mastering a DVD from various DVD sources.

This is a continuation post using DVD Styler, an application to build a DVD image file with menus and videos. This software creates a DVD file (.iso file) which can then be burned to disk, or viewed on the computer. The first part of using this software is here at part

Step 6: Add Text Object

You can also add in new object into menus. Right click and go to add to see a range of objects that can be added. In this case a url is to be added, so click Text.
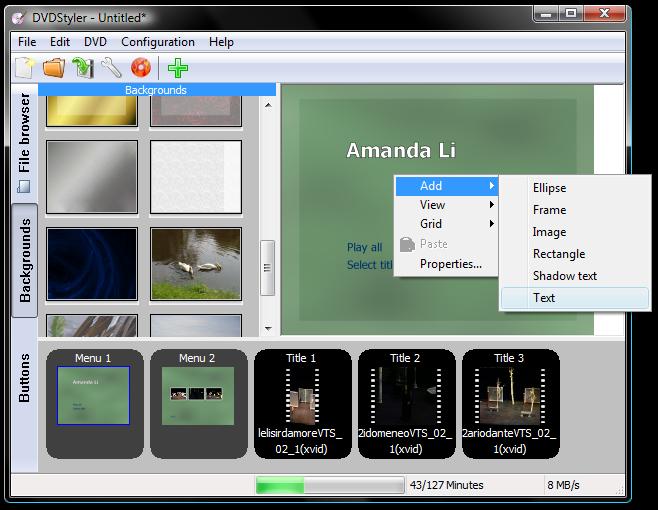
The right click menu on a menu, adding a piece of text

You can then type in the text to appear, and voila! A new text object has appeared in the menu. This can be moved or changed as before in step 5 in the previous post.

Step 7: Add Image Object

Just like text, a picture can be added into a menu using the same right-click menu. Right click on a space, go to Add, then Image. You can then search on your computer for an appropriate photo file.
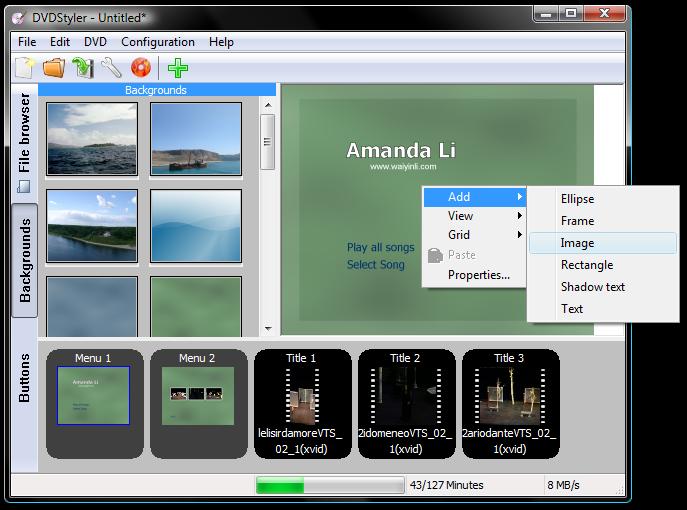
Right click menu, adding an Image to the menu

After adding the picture in, I had to resize it by dragging at the corners of the picture to get the right size, and dragging to the correct position on the menu.
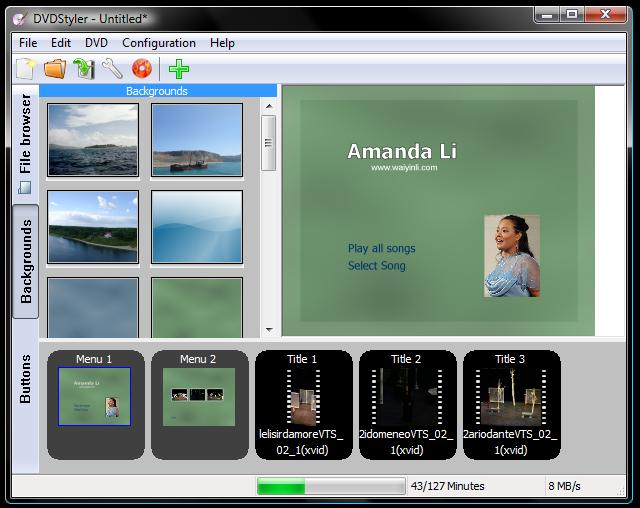
First menu page, showing Amanda’s picture, with URL link added in.

Step 8: Add Information menu page

Extra menus can be added for greater depth into the DVD menu system. Examples of use of this might be for a language selection screen, for a credits page or for extra text information about a movie. It is possible to create a new menu screen from scratch, but because menu settings have already been set in other menus, lets make a copy of an existing one and make changes to it. Go to  the bottom pane and click on menu2. Then Right click and click Copy. Now go to a space between menu 2 and Title 1. Right click and then select Paste. This should copy the first menu to a new “menu 3” Use the object editing tools mentioned before. The link buttons picture and text can be removed. New text can be added in to give the new page. Be sure to leave the back button so the user can get back to the main menu.
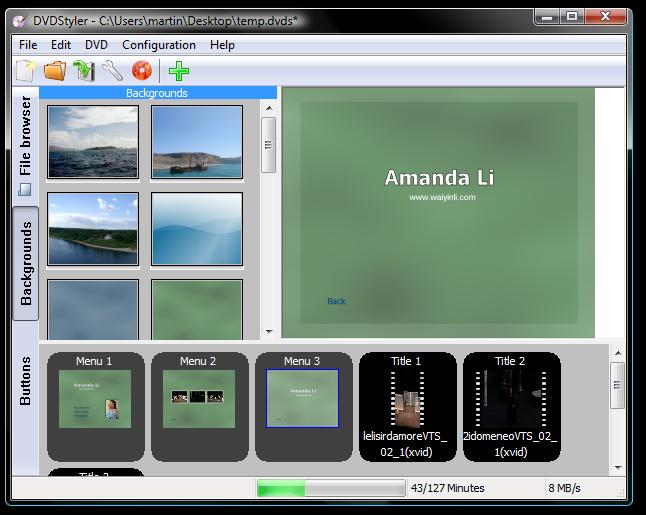
A new menu, called menu 3. This will be used as an information board.

Text and images can be added to the menu3 to populate it as needed.

This menu must be linked to the first menu in order for the user to find it. Buttons can be added from the Button selection panel on the far left if you want to experiment with different styles but to keep things simple, lets just copy another link on the menu1. Make a duplicate link by copying one menu, and pasting it back into the menu page. Use the right click actions on the screen to do this. The new link can be re-labeled appropriately (I named mine “information”) and moved to the correct place.

We must now change the destination of this button. Right click on the new button and go to properties. The button properties menu should appear as shown here.
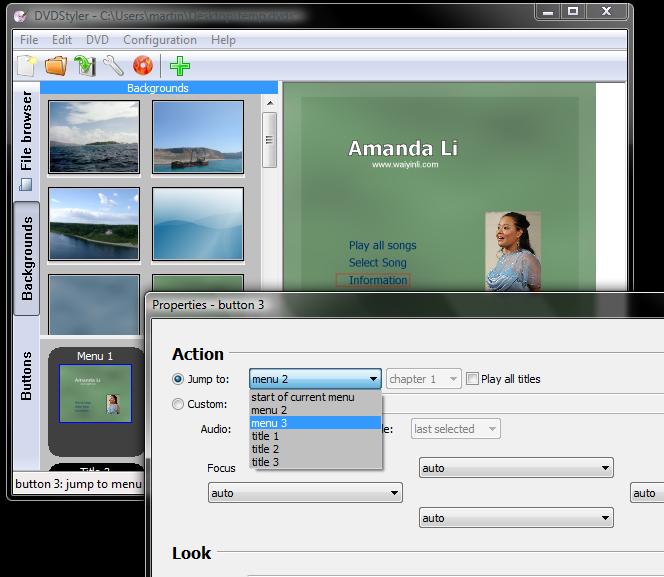
Showing properties dialog for a button.

Using the “jump to” drop down, change to menu 3; the new menu created earlier. This drop down menu represents every menu and video in the DVD image. This means that when this button is pressed, it will go to the selected video or menu.

By using these steps you can create as many menu pages as you like, and have them link in intricate ways to build up a system in any way you want.

Step 9: ‘Burn’ the DVD image

By now you should have a pretty complete DVD layout, consisting of menus, button links and videos. This should now be ready to put on to a DVD! Remember to save your work so far.

This software is capable of burning to a DVD, but I found the burn failed every time I tried. To solve this, I ‘burned’ the DVD to a single image file (an .iso file) which I would then use later on to check on the computer, or burn with another piece of software.

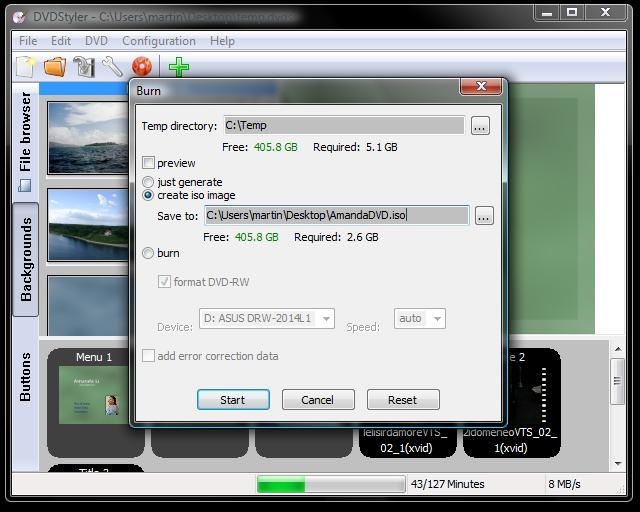
To create the DVD image, click the burn DVD icon (Red burning disc at the top of the main window) or click DVD -> burn DVD, or press F9. This will bring up the Burn DVD dialog as shown here

Burning DVD dialog.

Ensure the temp directory is set (I set mine to c:\temp, you dont really need to worry about where this is as you wont need to look at these files, but they get quite big so its useful to know where to delete them later on) Click “Create iso image” and select a place to save the iso file to. I put my file on the desktop for easy access. Now click Start to begin the burn.
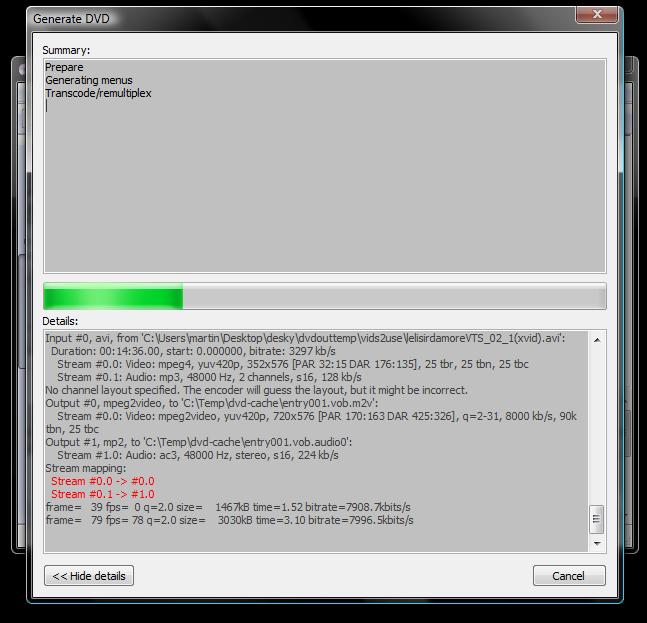
The generate DVD screen. This sits here for at least 30 mins

You will now see the DVD generation dialog. And it will sit there for at least 30 minutes. Unfortunately it will take this long to create the DVD image as there is a lot of re-compression of the videos to do. If you plan on doing this frequently for the same videos, I advise keeping the temporary files folder the same each time, and do not delete the temporary files. That should at least save the time of re-compressing the video files.

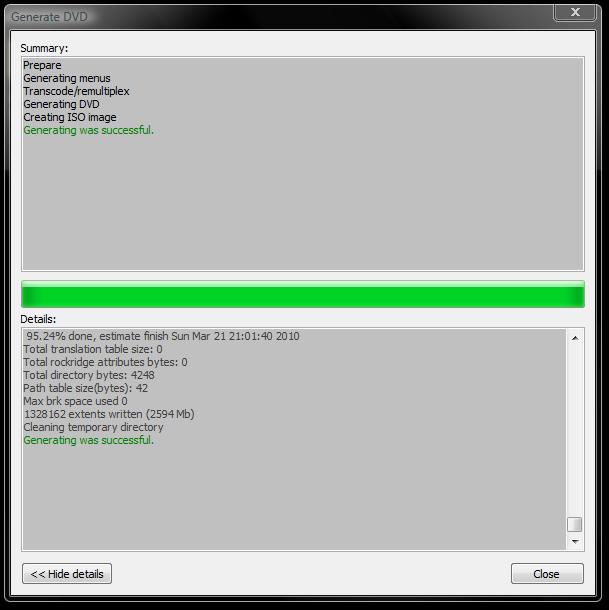
After some time you should find the completed DVD message:

A successful DVD build

In Green letters it will say “Generating was successful”

Check on your destination folder specified before (the desktop in my case) for the new .iso file. This is the image file for a DVD to be burned.

The next step will be to review the DVD image on the computer, to ensure all the work done is fine and to allow for any fixes to be done if necessary.

In the next post I will use WinRar to de-compress the .iso file to the hard-drive, so I can watch the DVD on the computer using VLC player.
Share Button

Tags: , , , , ,

No Comments

Create a DVD Tutorial. Part 6

This post begins from from here: Create a DVD tutorial in case you are lost.

In this post series I talk about mastering a DVD from various DVD sources.

In this post I take you through using DVD Styler, an application to build a DVD image file with menus and videos. This software creates a DVD file (.iso file) which can then be burned to disk, or viewed on the computer.

DVDStyler (http://www.dvdstyler.de/) is a DVD authoring application. Now I had my 3 videos in AVI format, cropped and faded (from the previous step) the next step is to compile the DVD image using these videos. DVD Styler is a great piece of software which creates DVDs which are usable in standard DVD players.

Using this software I ordered the videos how I wanted, and added a customised DVD menu system to select the Videos on the DVD, as well as an ‘info’ page.

There is lots more to this software than what is in this tutorial, but there should be enough here to get a feel for the program and do the basics. I’ve split this part of the tutorial into 2 posts because there was so many pictures.

Steps to author the DVD image:

  1. Start Application and Create a new project with Wizard
  2. Add videos
  3. Customise menu settings and background
  4. Edit, Move and Delete Objects in the menu pages
  5. Change Text
  6. Add Text Object
  7. Add Image Object
  8. Add Information menu page
  9. ‘Burn’ the DVD image

Step 1: Start Application and Create a new project with Wizard

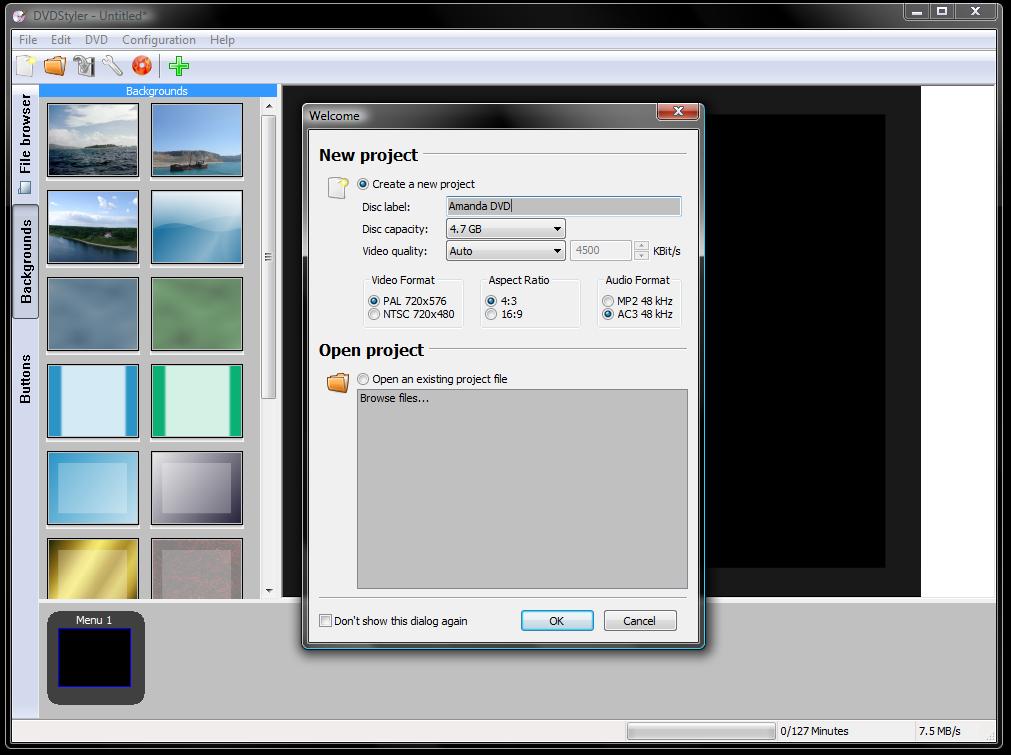
Downloading, installing and running the application was an easy process. When you run, you will be presented with this screen.

DVD Styler startup screen

A welcome wizard window pops up at the start, allowing you to create a new project or load a previously created one. To create a new project, type in the basic details and click OK. Basic details are:

  • disc label (this will be visible on the final DVD if you put it into a PC)
  • capacity (4.7gb for the most common single layer recordable DVDs)
  • video quality (I just left this on Auto)
  • Video format (PAL for UK, NTSC for US)
  • Aspect ratio (I chose standard 4:3 as my source videos are this ratio)
  • Audio format (I just left it has AC3 48Khz)

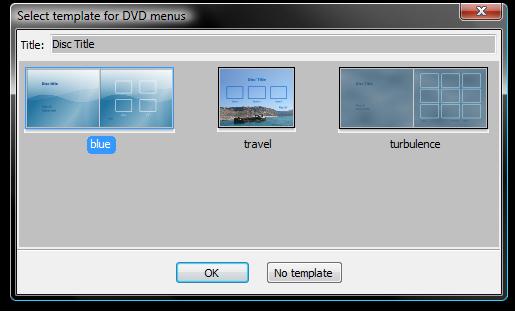
After clicking OK, a new window pops up asking for a default template to use. Enter a title and select “blue” as shown in the next picture.

Template selection menu for DVD menus

Click OK to complete the wizard and progress to the main window.

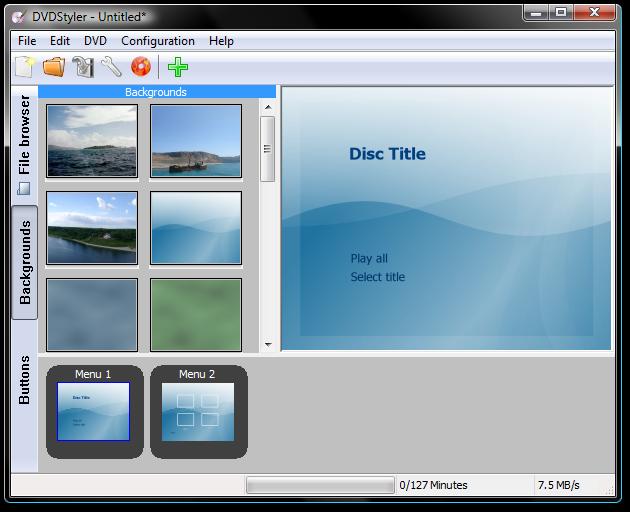
DVDStyler main window

This is the main screen. The bottom pane shows the menus and videos in this DVD session. The left pane shows default buttons and backgrounds that can be chosen. The right pane shows a larger version of the selected menu from the bottom.

Step 2: Add videos

Now its time to add the videos created in the previous step for this tutorial.

Picture showing right click on bottom pane to add in a video.

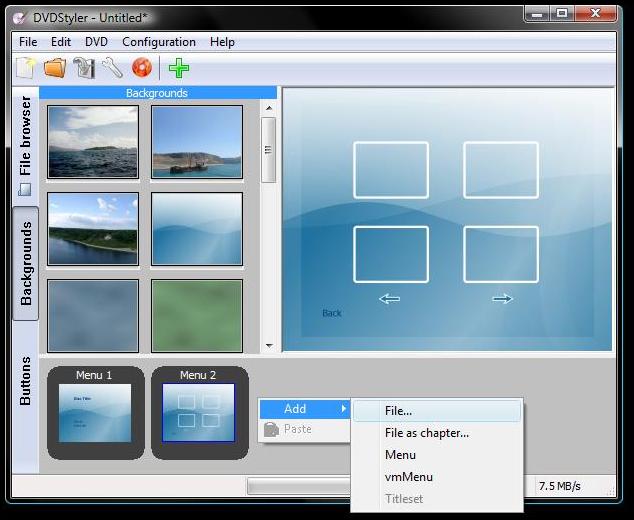
Right click in a space to the right of “menu 2”, click Add, then File… Next, find and select a video file you created earlier. You can only do this one at a time, so repeat this step for all the videos.

Loading a video takes some time. For me it took about 2 minutes to load in each video. This depends on the size of the file loaded and speed of the computer. Theres no indication of whats happenening so please just be patient.

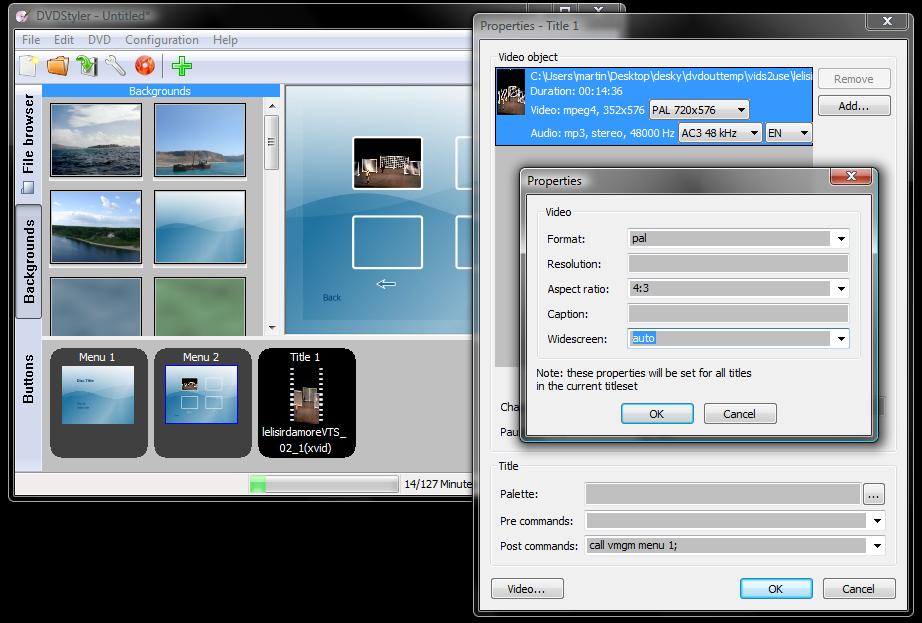
For each video loaded, settings are required. Click the video button at the bottom to get a 2nd properties page, as shown in the next picture

Properties windows for a new video

Make sure the Format and Aspect ratio match your initial settings. Nothing else needs changing. Click OK on both property windows and the video will appear at the bottom.

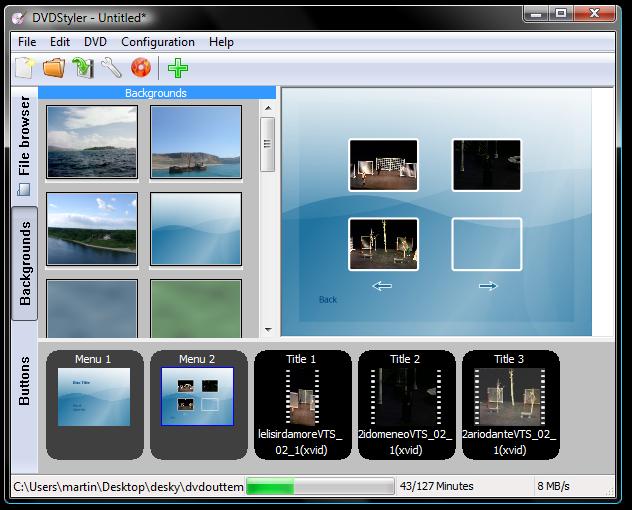
After loading all your videos, your screen should look like this:

All 3 videos added and visible on the bottom pane, and in the menu 2 scene selector

Menu 2 (click on it on the bottom pane if its not shown on the right) shows small pictures of each video. This is the scene selection menu. Usually on a DVD, you can play the whole thing at once, or select chapters or scenes using a menu like this.

Save your project here so you can come back to it later. Remember the old Control S rule. Save frequently in case anything bad happens, so you don’t lose too much work.

Step 3: Customise menu settings and background

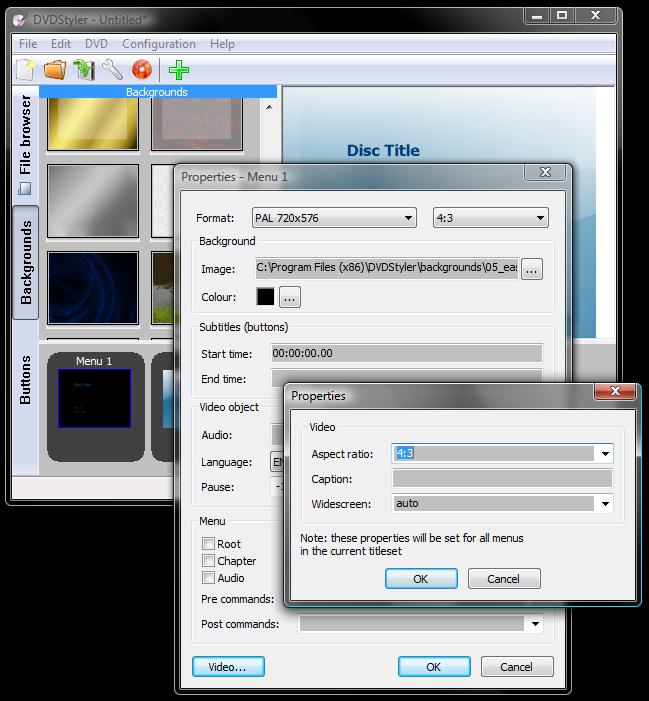
At this point you can change the background for menus. Each menu screen in the DVD has to be set individually so you have to do it for each menu. Starting with menu 1, right click on it on the bottom pane, then click Properties.

Properties windows for menus. Here you can change the background picture

Ensure the format is set correctly. In my case again, PAL with 4:3 aspect ratio. To change the background, Click the browser button (“…” button) next to Image near the top of the window. You can then choose a different image file for the background using the defaults in the folder, or select your own picture. I ended up choosing a turquoise background picture to replace the blue background.

Click on the Video button at the bottom to bring up the 2nd set of properties. Ensure the aspect ratio is set (in my case 4:3) and click OK to both properties windows.

Repeat this for menu 2.

The right pane shows menu 2, with new turquoise background

As you can see, the menu 2 on the right pane shows the new background. For me, the icons on the bottom pane didn’t seem to update properly, but so long as the larger right pane is correct, that is fine. The icons at the bottom are just thumbnails which presumably didn’t update.

Step 4: Edit, Move and Delete Objects in the menu pages

The menu pages consist of a background and basic elements such as text, images and buttons. These can be manipulated easily by using the mouse and property options of each object. Lets take the menu 2 for example.

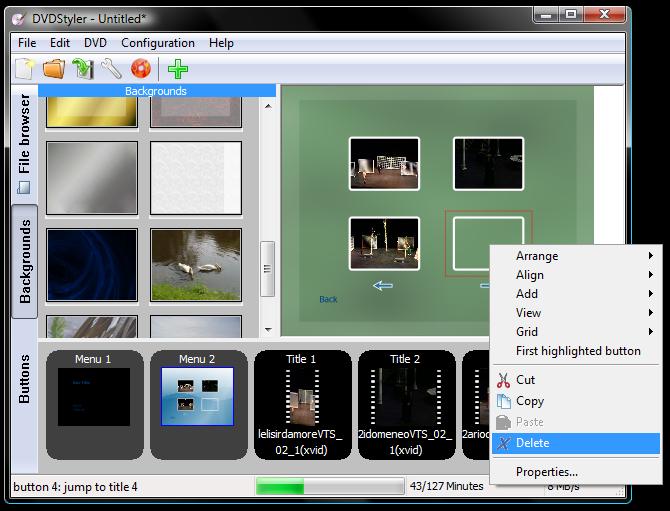
picture showing a selected object to be deleted.

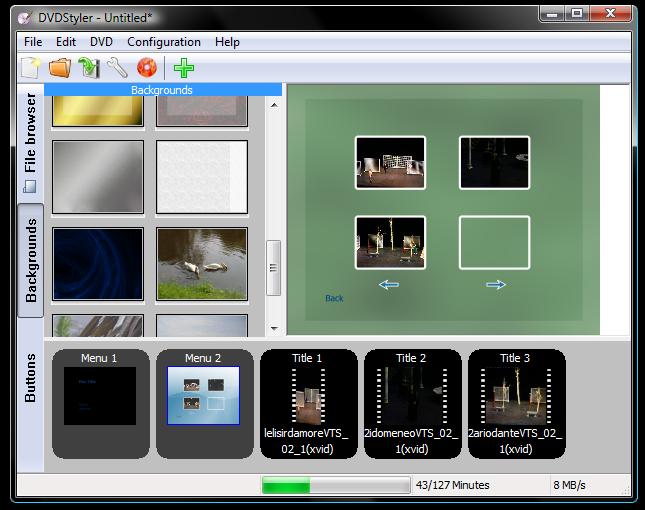
In this menu, there is space for 4 video selections and arrows at the bottom to skip between different scene selection menus if you have more than 4 selections to make. In my case, I have only 3 videos so the arrows and one video slot is not necessary.

To delete an object in the menu, click on in with the left mouse button. You will see a red outline around the selection object. Then right click and select delete (as shown on the previous picture)

The remaining objects can then be dragged about the screen using the mouse to make it more presentable.

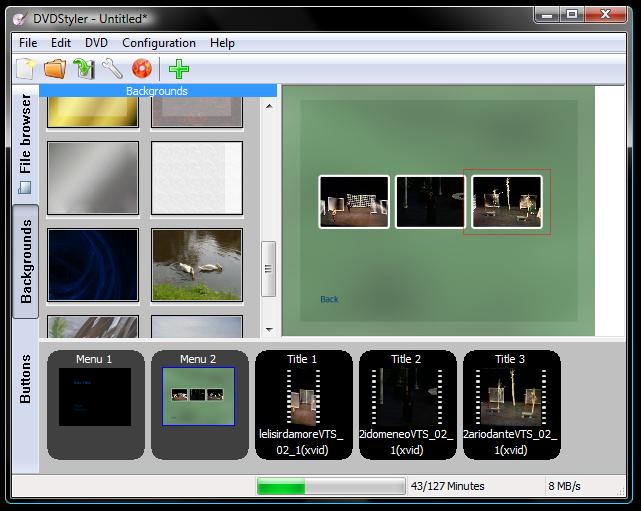
Only 3 scene selections now on the menu, and moved about to look better.

Because I only needed 3 scene options to choose, I rearranged them to look more appropriate.

Step 5: Change Text Object

In menu 1, I wanted to have Amanda’s name for the title. The template already created some text for the disc title, it says “Disc Title.” How original.

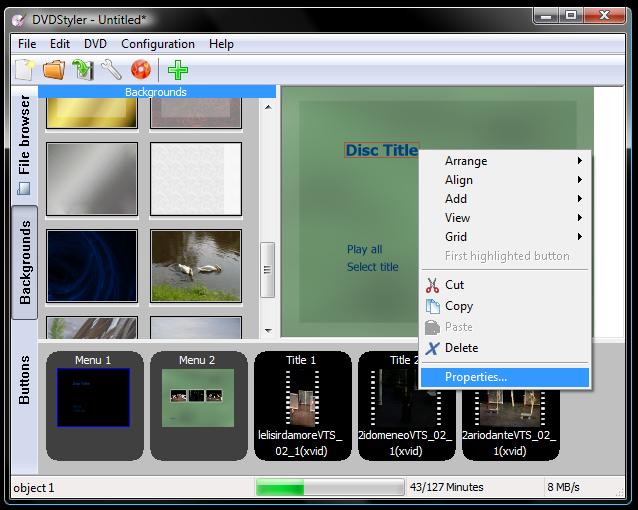
Getting options up for “Disc Title” text box so it can be changed

To change the text, select it, then right click and go to properties as shown in the previous picture.

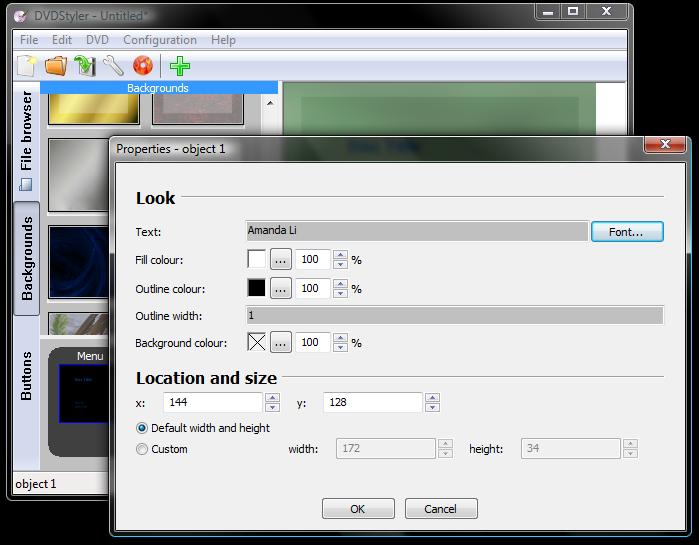
This will bring up the next properties menu for the text object.

Properties for the text object.

In this properties box, you can change the text displayed, as well as the font, colour and size. I found this to be an iterative process, continually changing, clicking OK, seeing how it was on screen, then going back in to make small changes to get it just right.

Check the next post for the next part in this stage of the tutorial to use DVDStyler.

Share Button

Tags: , , , ,

6 Comments