Posts Tagged dvd authoring

Create a DVD tutorial. Part 9

This post begins from from here: Create a DVD tutorial in case you are lost.

In this post series I talk about mastering a DVD from various DVD sources.

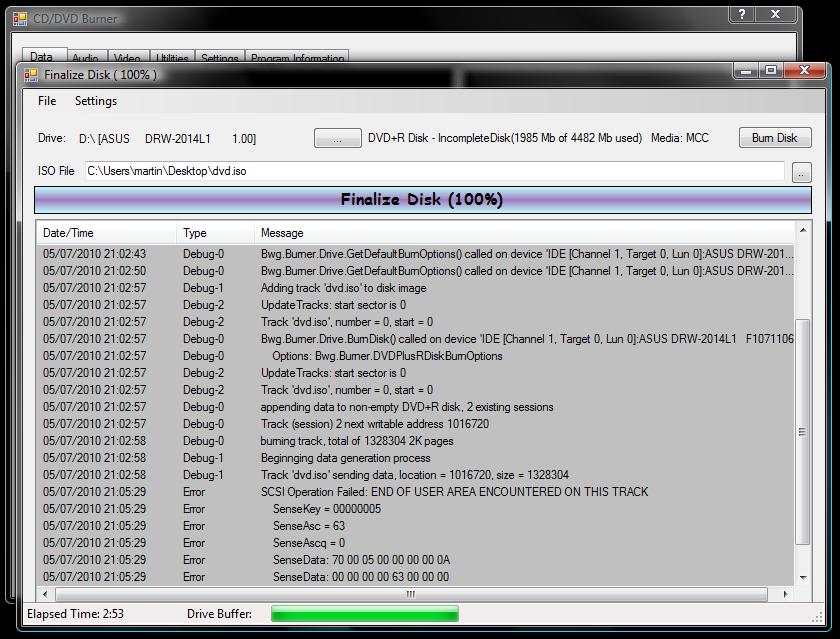
In this final post I will show you how to burn the image created in previous steps. I will use a piece of software called BwgBurn to burn (Burn the DVD image to a final DVD-R) (http://bwgburn.sourceforge.net/)

The steps are very easy so I wont elaborate too much on this one.

Steps to Burn the image:

  1. Insert a blank DVD-R into your DVD recorder
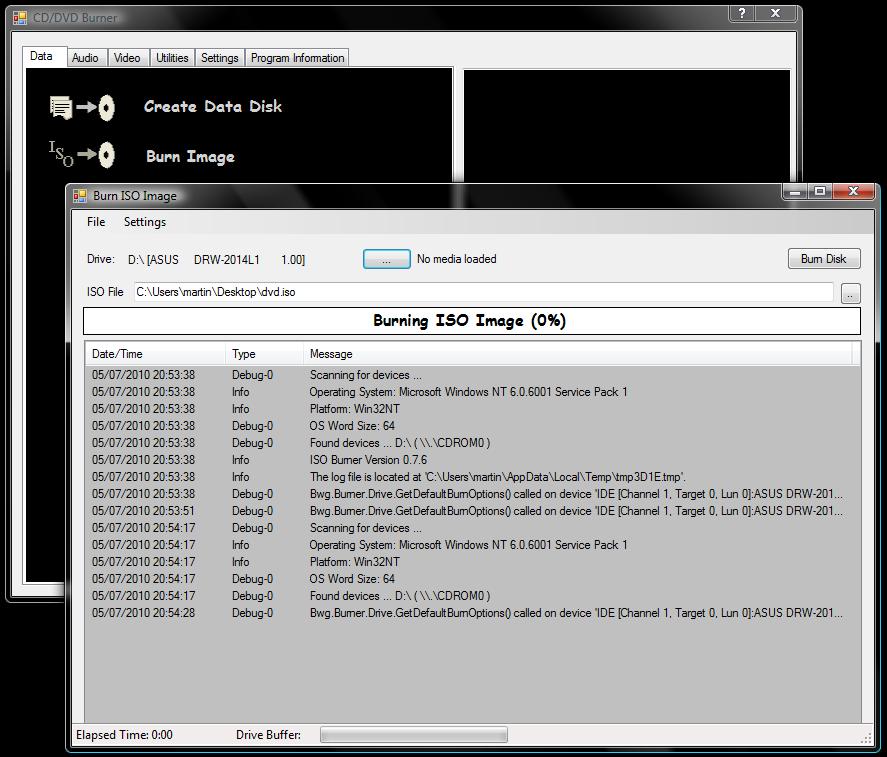
  2. Click Burn Image icon
  3. Select ISO file (Use the “..” button on the right hand side to locate the dvd.iso file created earlier)
  4. Select Burn Disk. (Click the burn button. You will see text appear at the bottom and the progression bar increase. With any luck the DVD will complete and show you the completed message!)

Finished!

Thats it! Congratulations on your mastered DVD. You can now watch your work on a standard DVD player. There are lots and lots of customisation options to the various software parts. As you practise and become more skilled, you can make more professional looking work. As some companies have shown, you can sell this skill in recording a wedding or event, or save some serious money in doing it all yourself. Well done!
Share Button

Tags: , , , ,

No Comments

Create a DVD tutorial. Part 8

This post begins from from here: Create a DVD tutorial in case you are lost.

In this post series I talk about mastering a DVD from various DVD sources.

In this post I will show you how to look at the DVD iso master file you created using DVD styler in the previous post

I will use WinRAR, a shareware file archiving application to extract the files to a folder, then use VLC media player to look at the DVD as if you had created a real DVD and put it into a real player. You can test the menus, videos and proof read any text before burning to CD.

If you find any corrections, go back and use DVD Styler to re-create the ISO file, as described in the previous post, including your corrections.

Steps to Check the DVD iso master file:

  1. Use WinRAR to uncompress the DVD file to a folder on the desktop.
  2. Open the DVD folder using VLC media player
  3. Navigate the menus and play through the DVD

Step 1: Use WinRAR to uncompress the DVD file to a folder on the desktop.

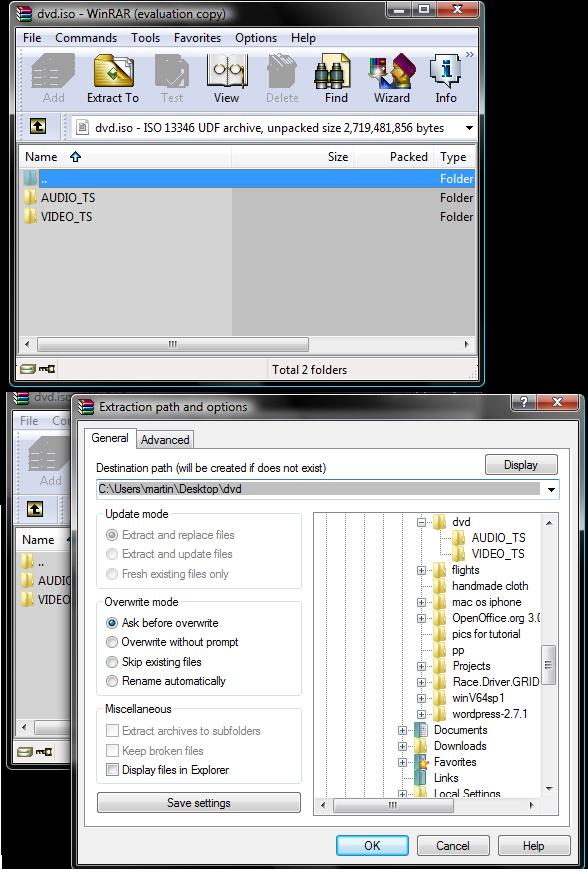
After downloading and installing WinRAR (http://www.rarlab.com/), right click on the dvd iso file and select Open with → WinRAR application. This opens the WinRAR dialog as shown..

This is the contents of a standard DVD. Both folders should be extracted. Click on the “Extract to…” button at the top of the window. Be sure not to have any folders selected in the main window pane, that will extract only what is selected. Instead everything is needed.

Select a folder to extract to. I chose “DVD” on the desktop folder. Click OK to begin.

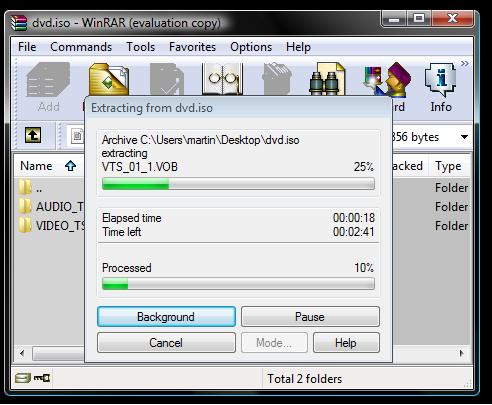
This stage took about 3 minutes for me, but it will depend on the speed of your computer and size of DVD image file.

Step 2: Open the DVD folder using VLC media player

Open VLC media player and click Media → open disk (or press CTRL + D)

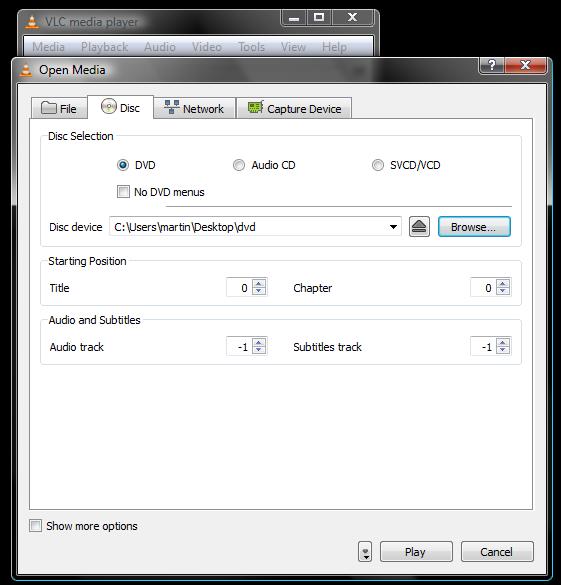
In the disk open menu, select a DVD as a disk, then click on the Browse button. Navigate to the folder with your extract files in it. Previously I extracted my files to “DVD” on the desktop, so I selected that folder and the path was populated.

Open media dialog, with disc device path selected

Finally, click Play to load the DVD.

Step 3: Navigate the menus and play through the DVD

You should now see the DVD main menu. Use the standard play controls to navigate through the DVD. Use the mouse to click on the menu options. Note down any mistakes and go back to DVD styler if you need to make corrections and repeat the process.

Once you are satisfied with the final DVD image, its time to move on to the final step and burn it to a recordable DVD.

Share Button

Tags: , , , , , , ,

No Comments