This post begins from from here: Create a DVD tutorial in case you are lost.
In this post series I talk about mastering a DVD from various DVD sources.
This post talks about taking the ripped DVD files (VOB files, created in the previous step) and converting them to .AVI format for use in the video editor in the next step
Step 3. ConvertVobToAvi (Convert the DVD files to more usable file formats)
This software (http://www.convertvobtoavi.com/) does exactly as the name says. The file format created using DVD Decrypter in the previous step created a .VOB file. This needs to be converted to .AVI file to be read in the editing application (next step)
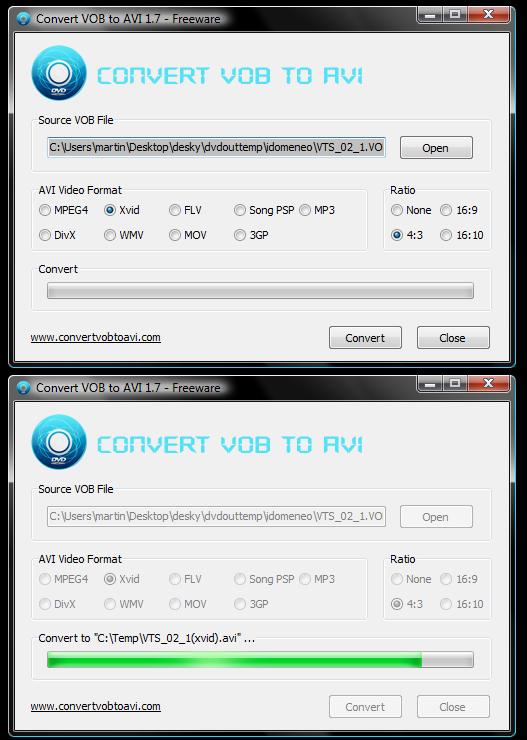
After downloading, installing and loading the application, click open in the “Source VOB File” section (at the top of the window) and locate the VOB file that you created earlier for your DVD track.
Next select the output format and ratio size. Select XVID and 4:3 for just now. Notice you could also make different formats (even for PSP) and widescreen (16:9) if you feel like experimenting.
Click Convert. You will then be asked for the destination folder. I put this in C:\TEMP but you can put it on your desktop folder so you dont lose it. After selecting the folder the conversion will begin.
You can see the progression of the file as shown on the bottom screen shot, but I found that it took 3-4 minutes longer after the progression bar had reached the top before the SAVING SUCCESS message popped up.
I did this with all 3 VOB files (the DVD tracks I ripped earlier) to produce 3 AVI files.
My source video was 4:3 and I used XVID because I know its an open-source codec. I would recommend using these as defaults but if your source DVD is widescreen or a different ratio, then you can change to suit.

